In the intro web course we have relied on Javascript for handling all of our view logic when building out our dynamic web applications. Sites built in that manner are said to be Client Side Rendered (CSR) and they rely on techniques like AJAX to give the user an applike experience.
However, in this lab we will explore how we can build a web application without a single line of javascript. To do this, we would require our application server to handle all of our view logic instead of javascript. Hence an application of this type is said to be as Server Side Rendered (SSR).
The differences of SSR and CSR are explored in more depth in this series of articles.
Task 1.1
Just like in the previous labs, fork this link to create a copy of the project on your own GitHub account, then, clone it. Open the appropriate folder in VSCode and run the following commands.
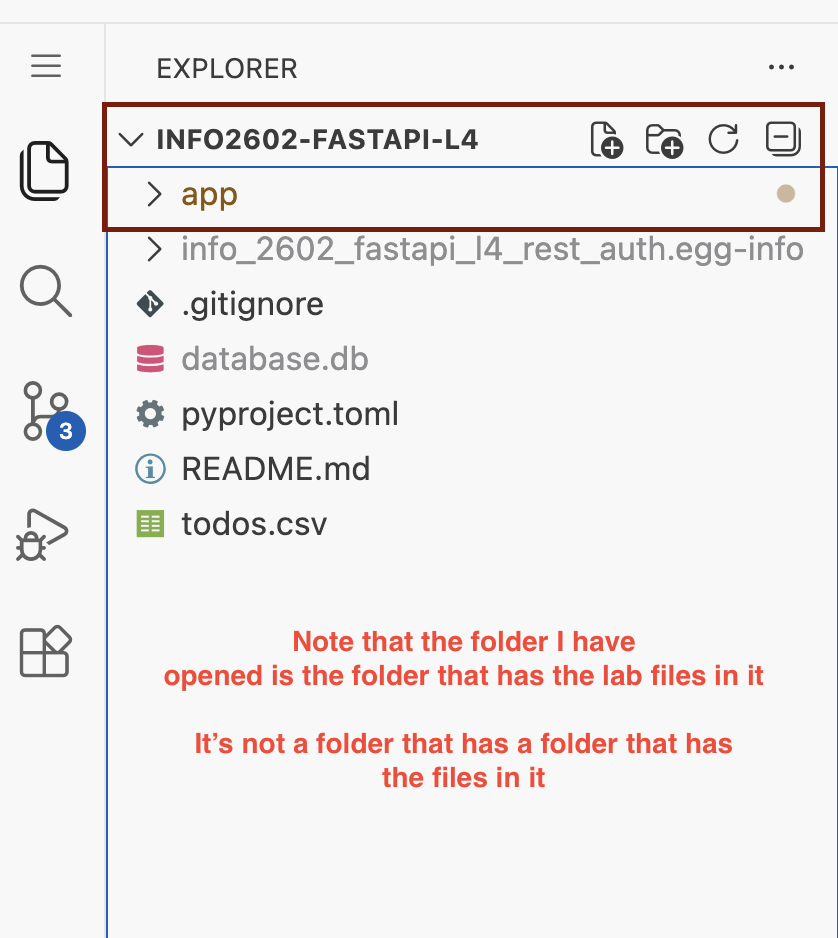
Ensure the folder you open is the one that has the python files and app folder.
python -m venv venvvenv\Scripts\activateif you're on windows or
source venv/bin/activateif on Mac/Linuxpip install -e .
If you get any errors on step 3. It's likely you have the wrong folder open in VSCode. Open the correct folder and try again from step 1. The file panel in VSCode should look like this
As we will not be using javascript to render our views, we need another mechanism to write dynamic html. We shall use jinja2 which is a template engine, it allows us to write our html dynamically on the server as opposed to rendering in the client with javascript.
Template Inheritance
Jinja allows us to split up our html code into components called templates and pass data to them. We can also have templates inherit from other templates so that common markup do not have to be repeated.
Task 2.1
Open templates/layout.html
<!doctype html>
<html>
  <head>

     <!--Import Google Icon Font-->
    <link href="https://fonts.googleapis.com/icon?family=Material+Icons" rel="stylesheet">
    <!-- Compiled and minified CSS -->
    <link rel="stylesheet" href="https://cdnjs.cloudflare.com/ajax/libs/materialize/1.0.0/css/materialize.min.css">
    <!--Let browser know website is optimized for mobile-->
    <meta name="viewport" content="width=device-width, initial-scale=1.0"/>
    <title>{% block title %}{% endblock %}</title>
    <style>
      {% block styles %}{% endblock %}

      #alert{
        width: 80vw;
        height: 50px;
        padding: 15px;
        right: 10vw;
        line-height: 20px;
        border-radius: 4px;
        top: 90px;
        position: absolute;
        z-index: 10;
      }

      #close{
        font-size: 25px;
        position: absolute;
        top: 10px;
        right: 10px;
      }
    </style>

  </head>
  <body>
    <nav class="blue">
      <div class="nav-wrapper">
        <a href="#!" class="brand-logo center">{% block page %}{% endblock %}</a>
        {% block link %}{% endblock %}
      </div>
    </nav>

    <div id="content" >

      {% block content %}{% endblock %}
    </div>

    <script src="https://cdnjs.cloudflare.com/ajax/libs/materialize/1.0.0/js/materialize.min.js"></script>
  </body>
</html>
This is our base template which means all other templates would inherit the markup inside of it.
The {% block title %}{% endblock %} code is jinja syntax which indicates areas of the template to be replaced by its children. Blocks must be uniquely named and also defined in a child template.
Now open templates/login.html
{% extends "layout.html" %}
{% block title %}Login{% endblock %}
{% block page %}Login{% endblock %}

{% block link%}
    <ul id="nav-mobile" class="right">
        <li><a href="/signup">Signup</a></li>
    </ul>
{% endblock %}


{% block content %}
<main class="container" style="margin-top:100px">
   <form class="card col s12" id="loginForm" method="POST" action="/login" style="padding:1em">

      <div class="row">
        <div class="input-field col s12">
          <input placeholder="Placeholder" name="username" type="text" class="validate">
          <label for="first_name">Username</label>
        </div>
      </div>
      <div class="row">
        <div class="input-field col s12">
          <input name="password" type="password" class="validate">
          <label for="password">Password</label>
        </div>
      </div>
      <div class="card-action row">
        <input type="submit" class="blue text-white btn right">
      </div>
  </form>
</main>
{% endblock %}
As this is a child template, an extends block must be given to indicate its parent template. The text/HTML specified in the blocks of a child template would be rendered within the corresponding blocks of its parent template.
Next if you look in routers/auth.py you will see that the login route returns a function call that renders the template using TemplateResponse().
@auth_router.get("/login", response_class=HTMLResponse)
async def login_page(request: Request):
    return templates.TemplateResponse(
        request=request,
        name="login.html",
    )
It will render whatever html file is specified and located in the templates directory. Hence the following result is achieved. 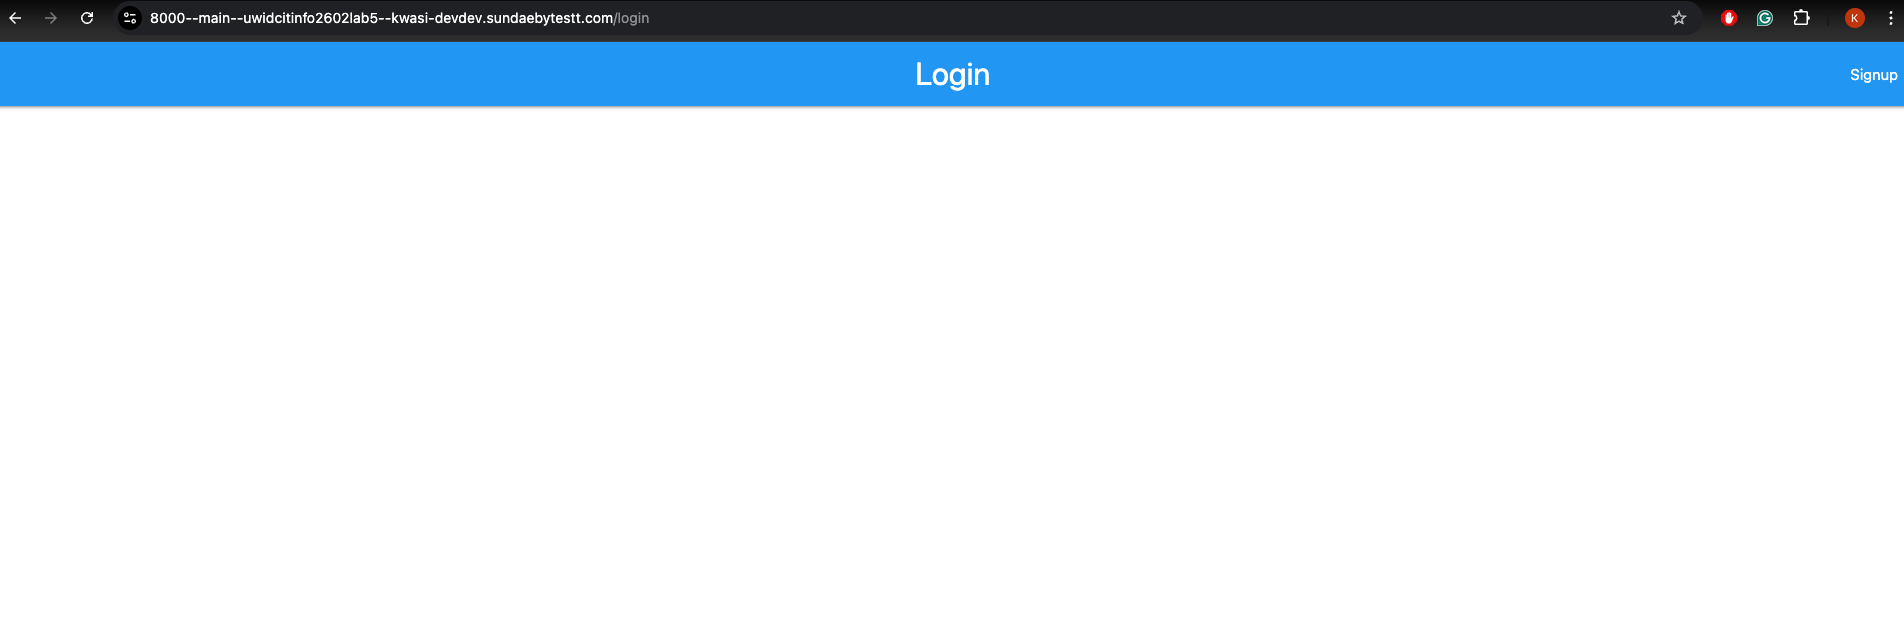
If you view the source of the page you will notice all of the parent's markup is included when the child is rendered.
We shall use the same token based authentication stored in the cookies for this lab. Next we shall implement our authentication UI and routes.
Task 3.1
Update content block in signup.html with the following markup to implement a signup form
<main class="container" style="margin-top: 100px">
   <form class="card col s12" id="loginForm" method="POST" action="/signup" style="padding:1em">

      <div class="row">
        <div class="input-field col s12">
          <input placeholder="Placeholder" name="email" type="email" class="validate">
          <label for="first_name">Email</label>
        </div>
      </div>
      <div class="row">
        <div class="input-field col s12">
          <input placeholder="Placeholder" name="username" type="text" class="validate">
          <label for="first_name">Username</label>
        </div>
      </div>
      <div class="row">
        <div class="input-field col s12">
          <input name="password" type="password" class="validate">
          <label for="password">Password</label>
        </div>
      </div>
      <div class="card-action">
        <input type="submit" class="blue text-white btn">
      </div>

  </form>
</main>
Task 3.2
Update content block in login.html with the following markup to implement a signup form
<main class="container" style="margin-top:100px">
   <form class="card col s12" id="loginForm" method="POST" action="/login" style="padding:1em">

      <div class="row">
        <div class="input-field col s12">
          <input placeholder="Placeholder" name="username" type="text" class="validate">
          <label for="first_name">Username</label>
        </div>
      </div>
      <div class="row">
        <div class="input-field col s12">
          <input name="password" type="password" class="validate">
          <label for="password">Password</label>
        </div>
      </div>
      <div class="card-action">
        <input type="submit" class="blue text-white btn">
      </div>
  </form>
</main>
That should add the content for the login and signup pages to the site on /login and /signup
Task 3.3
Implement the login action functionality that takes a user's information and logs them in, returning a response that stores the cookie in it.
@auth_router.post("/login")
async def login_action(
    form_data: Annotated[OAuth2PasswordRequestForm, Depends()],
    db: SessionDep,
    request: Request
) -> Response:
    user = db.exec(select(User).where(User.username == form_data.username)).one_or_none()
    if not user or not verify_password(plaintext_password=form_data.password, encrypted_password=user.password):
        raise HTTPException(
            status_code=status.HTTP_401_UNAUTHORIZED,
            detail="Incorrect username or password",
            headers={"WWW-Authenticate": "Bearer"},
        )
    access_token = create_access_token(data={"sub": f"{user.id}", "role": user.role},)

    max_age = 1 * 24 * 60 * 60 # (1 day converted to secs)
    response = RedirectResponse(url="/", status_code=status.HTTP_303_SEE_OTHER)
    response.set_cookie(key="access_token", value=f"Bearer {access_token}", httponly=True, max_age=max_age, samesite="lax")
    flash(request, "Logged in successfully")

    return response
Task 3.4
Implement the login action functionality that takes a user's information and logs them in, returning a response that stores the cookie in it.
@auth_router.post('/signup', response_model=UserResponse, status_code=status.HTTP_201_CREATED)
def signup_user(request:Request, db:SessionDep, username: Annotated[str, Form()], email: Annotated[str, Form()], password: Annotated[str, Form()],):
    try:
        new_user = RegularUserCreate(
            username=username,
            email=email,
            password=encrypt_password(password)
        )
        new_user_db = User.model_validate(new_user)
        db.add(new_user_db)
        db.commit()
        flash(request, "Registration completed! Sign in now!")
        return RedirectResponse(url="/login", status_code=status.HTTP_303_SEE_OTHER)
    except Exception as e:
        print(e)
        db.rollback()
        raise HTTPException(
                    status_code=400,
                    detail="Username or email already exists",
                    headers={"WWW-Authenticate": "Bearer"},
                )
Task 3.5
Next we set up the home page of the application. Update routers/home.py and implement the /app route.
@home_router.get("/app", response_class=HTMLResponse)
async def app_dashbaord(
    request: Request,
    user: AuthDep
):
    return templates.TemplateResponse(
        request=request,
        name="todo.html",
        context={
            "current_user": user
        }
    )
The route is protected by the AuthDep dependency to ensure only logged in users can access it. Since that dependency returns the logged in user that calls the route, we can then pass it to the template using the template's context and perform logic in the template such as rendering the user's username.
{% block page %} {{ current_user.username }}'s' Todo{% endblock %}
Which prints the logged in user's username in the navbar.
Finally you can try creating a user and logging in. After logging in we will be directed to the todo page with a flash message and text welcoming the user.
If you reload the page, the flash message would disappear but the user is still logged in.
If you click on the start of the url bar you will see the cookies on the browser, if you click through you can find the values in the cookie. This allows users to remain logged in between page loads.
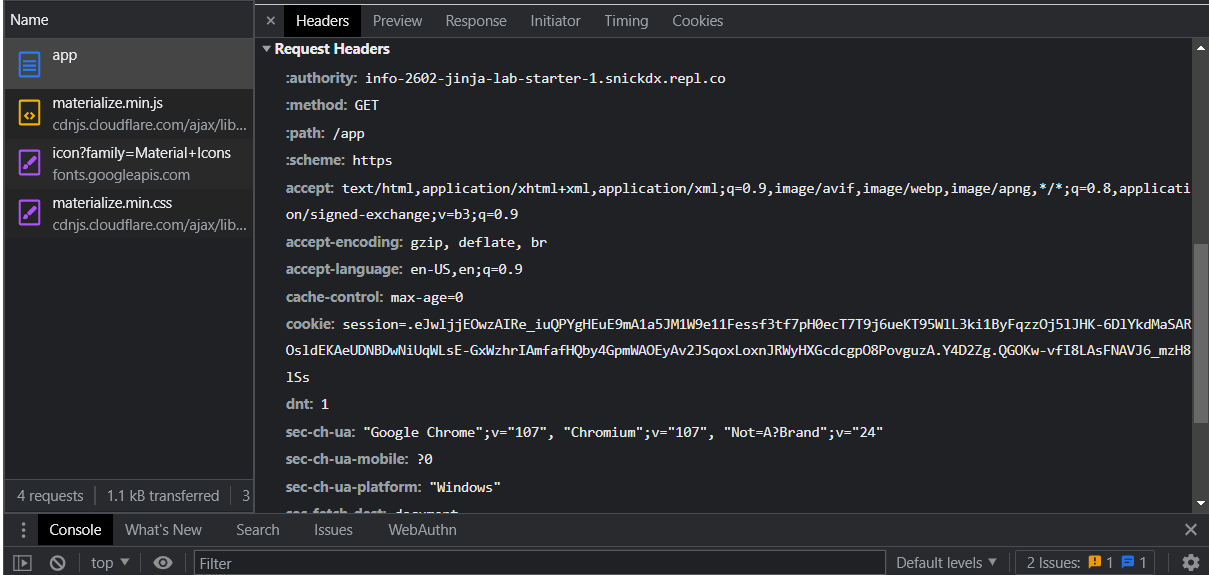
If you open the chrome debugger, open the network tab and reload the page you can view the details of the request to todos. In the headers tab you can see the value of the cookie automatically sent in the request.
Now that users are logged in we can have them manipulate data in the application. First we create a form to add todos
Task 4.1
Update templates/todo.html
{% extends "layout.html" %}
{% block title %}Todo App{% endblock %}
{% block page %} {{ current_user.username }}'s' Todo{% endblock %}

{% block link%}
    <ul id="nav-mobile" class="right">
        <li><a href="/logout">Logout</a></li>
    </ul>
{% endblock %}

{% block styles %}
  div.card{
    margin:0;
  }

  #result{
    margin-top:10px;
    height: 40vh;
    overflow-y: scroll;
  }

  .card{
    height: 265px;
    padding-top: 50px;
  }

{% endblock %}

{% block content %}

<main class="container" style="padding-top: 75px">
  <form name="addForm" class="card" method="POST" action="/todos">
    <div class="card-content">
      <span class="card-title">Create Todo</span>
        <div class="input-field">
          <input type="text" name="text" placeholder="Enter Todo Text" class="materialize-textarea">
          <label for="text">Enter Todo Text</label>
        </div>
    </div>
    <div class="card-actions">
        <div class="row">
          <div class="col sm12 m4 offset-m8">
            <input class="btn blue right" type="submit" value="SAVE" />
          </div>
        </div>
    </div>
  </form>
</main>
{% endblock %}
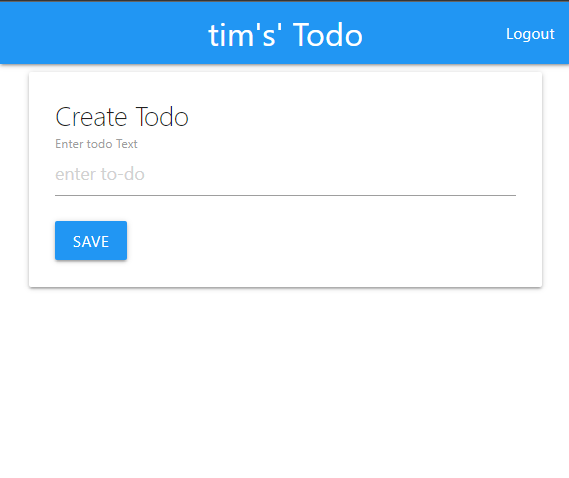
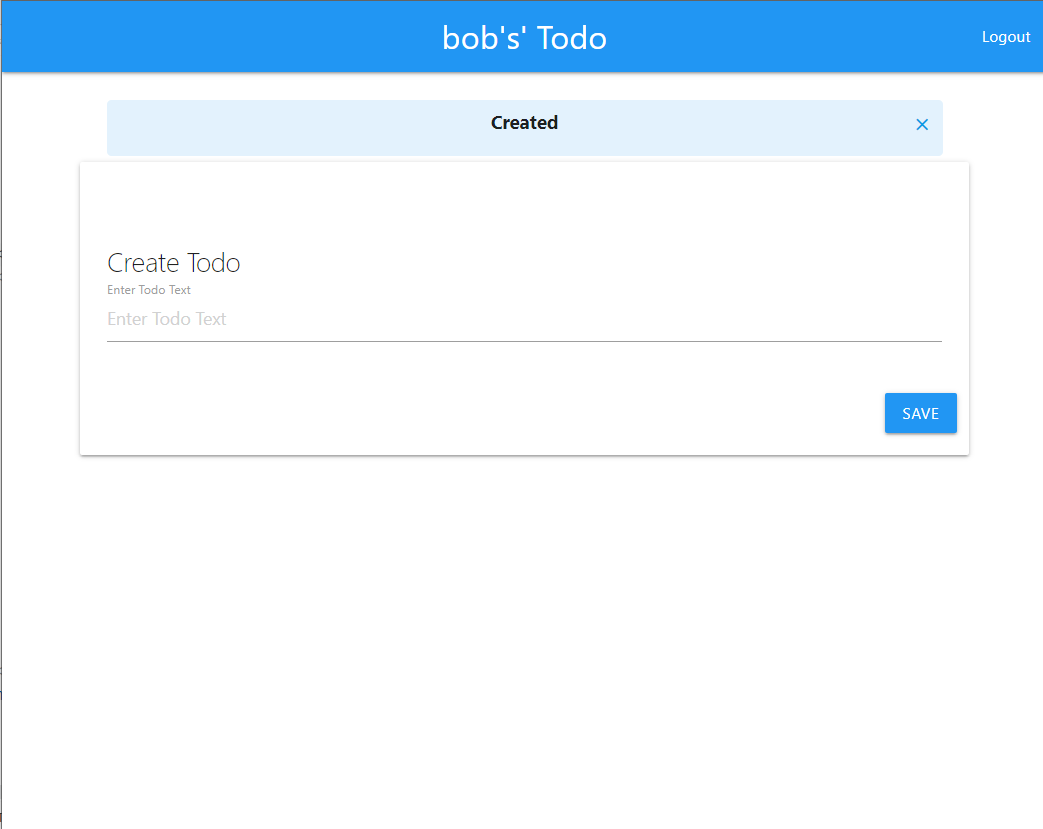
The page should now look like the following
Task 4.2
Next, we add the following create_todo_action() route that will handle the submit action on the create todo form and create our todo for the logged in user.
@todo_router.post("/todos")
def create_todo_action(request: Request, text: Annotated[str, Form()], db:SessionDep, user:AuthDep):
    user.todos.append(Todo(text=text))
    db.add(user)
    db.commit()
    flash(request, "Item created successfully")
    return RedirectResponse(url="/app", status_code=status.HTTP_303_SEE_OTHER)
If we test the form we should see the flash message indicating the creation of the todo.
Next we'd like to render our todos on the page. This is a simple matter of querying the data and passing it to the template.
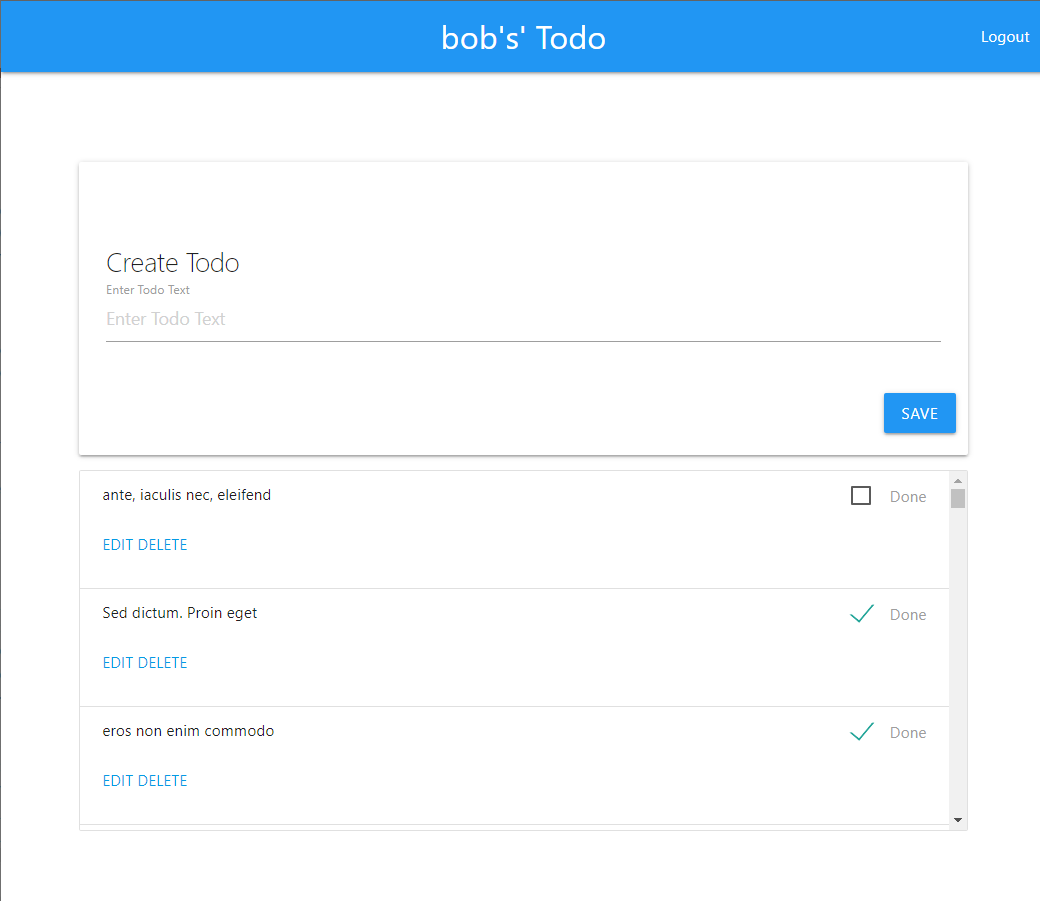
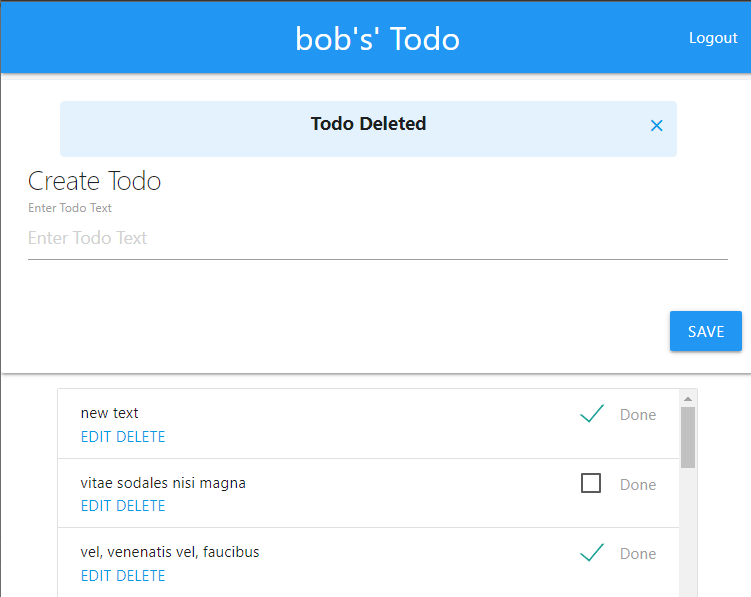
We make use of the for syntax from jinja2 to render a list item for every todo object in the current logged in user's todos which was passed by the route. Now if you reload the todo page you should see a list of todos.
We also place an if statement in the done checkbox to check off todos which are completed.
Task 4.4
Update todo.html adding the following content under the form
  <ul class="collection " id="result">
      {% for todo in current_user.todos %}
           <li class="collection-item">
              <form class="row" method="POST" action="toggle/{{todo.id}}" >
                <span class="card-title">{{todo.text}}
                  <label class="right">
                    <input type="checkbox" name="done" onchange="this.form.submit()" {%  if todo.done %} checked {% endif %} />
                    <span>Done</span>
                  </label>
                </span>
              </form>
              <div class="row">
                <a href="/editTodo/{{todo.id}}">EDIT</a>
                <a href="/deleteTodo/{{todo.id}}">DELETE</a>
              </div>
          </li>
      {% endfor %}
  </ul>
Now the todos should be rendered on the site.
We shall explore how the inputs work in the next section.
As we won't be using any javascript for this app all interactivity must be done via requests in the browser. This can be achieved by either sending a POST/GET request via a HTML form or a get request via hyperlinks.
Task 5.1
Update routers/todo.py to add the following toggle route to update the appropriate todo based on the ID given in the url from the table.
@todo_router.post('/toggle/{id}')
async def toggle_todo_action(request: Request, id: int, db:SessionDep, user:AuthDep):
    todo = db.exec(select(Todo).where(Todo.id == id, Todo.user_id == user.id)).one_or_none()
    if not todo:
        flash('Invalid id or unauthorized')
    else:
        todo.done = not todo.done
        db.add(todo)
        db.commit()
        flash(request, f'Todo { "done" if todo.done else "not done" }!')

    return RedirectResponse(url=request.url_for('app_dashbaord'), status_code=status.HTTP_303_SEE_OTHER)
Next we are going to add functionality to the "edit" button.
Task 5.2
Update routers/todo.py to add the following.
@todo_router.post('/editTodo/{id}')
def edit_todo_action(request: Request, id: int, text: Annotated[str, Form()], db:SessionDep, user:AuthDep):
todo = db.exec(select(Todo).where(Todo.id == id, Todo.user_id == user.id)).one_or_none()
if not todo:
flash(request, 'Invalid id or unauthorized')
else:
todo.text = text
db.add(todo)
db.commit()
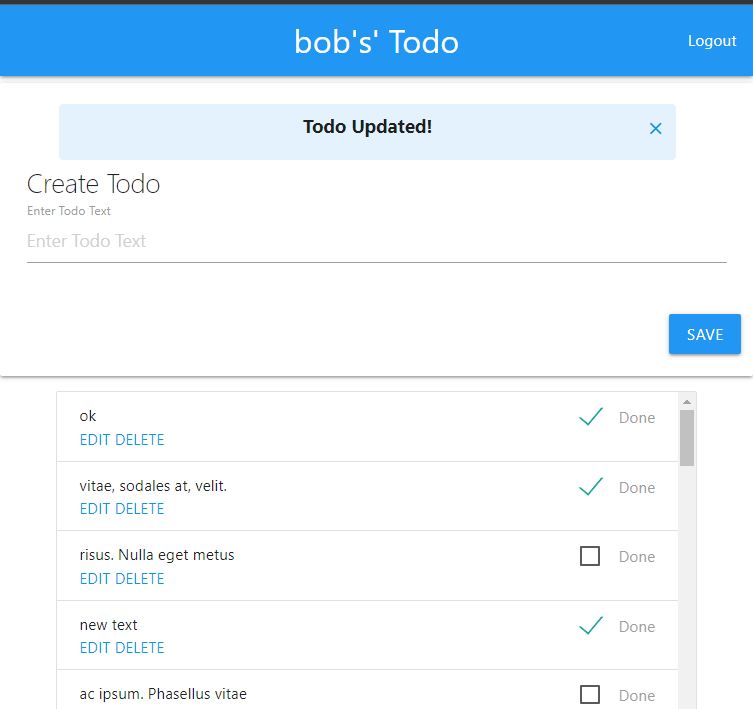
flash(request, f'Todo updated!')
return RedirectResponse(url=request.url_for('app_dashbaord'), status_code=status.HTTP_303_SEE_OTHER)
Task 5.3
Finally, update templates/edit.html
{% extends "layout.html" %}
{% block title %}Todo App{% endblock %}
{% block page %} Editing Todo{% endblock %}

{% block link%}
    <ul id="nav-mobile" class="right">
        <li><a href="/logout">Logout</a></li>
    </ul>
{% endblock %}

{% block styles %}
  div.card{
    margin:0;
  }

  #result{
    margin-top:10px;
    height: 55vh;
    overflow-y: scroll;
  }

  .card{
    height: 265px;
    padding-top: 50px;
  }

{% endblock %}

{% block content %}

        <form name="editForm" class="card" method="POST" action="/editTodo/{{todo.id}}">
          <div class="card-content">
            <span class="card-title">Editing Todo - {{ todo.text }}</span>
              <div class="input-field">
                <input type="text" name="text" placeholder="Enter new todo text" class="materialize-textarea">
                <label for="text">Enter Todo Text</label>
              </div>
          </div>
          <div class="card-actions">
              <div class="row">
                <div class="col sm12 m4 offset-m8 ">
                  <input class="btn blue right" type="submit" value="Update" />
                  <a class="btn white black-text right" style="margin-right: 5px" href="/app">Cancel</a>
                </div>
              </div>
          </div>
        </form>

       <main class="container">
          <ul class="collection " id="result">
            {% if current_user.is_authenticated %}
                {% for todo in todos %}
                     <li class="collection-item">
                        <form  method="POST" action="toggle/{{todo.id}}" >
                          <span class="card-title">{{todo.text}}
                            <label class="right">
                              <input type="checkbox" name="done" onchange="this.form.submit()" {%  if todo.done %} checked {% endif %} />
                              <span>Done</span>
                            </label>
                          </span>
                        </form>
                        <div class="card-action">
                          <a href="/editTodo/{{todo.id}}">EDIT</a>
                          <a href="/deleteTodo/{{todo.id}}">DELETE</a>
                        </div>
                    </li>
                {% endfor %}
            {% endif %}
          </ul>
    </main>
{% endblock %}
The action attribute receives the id of the todo from the route.
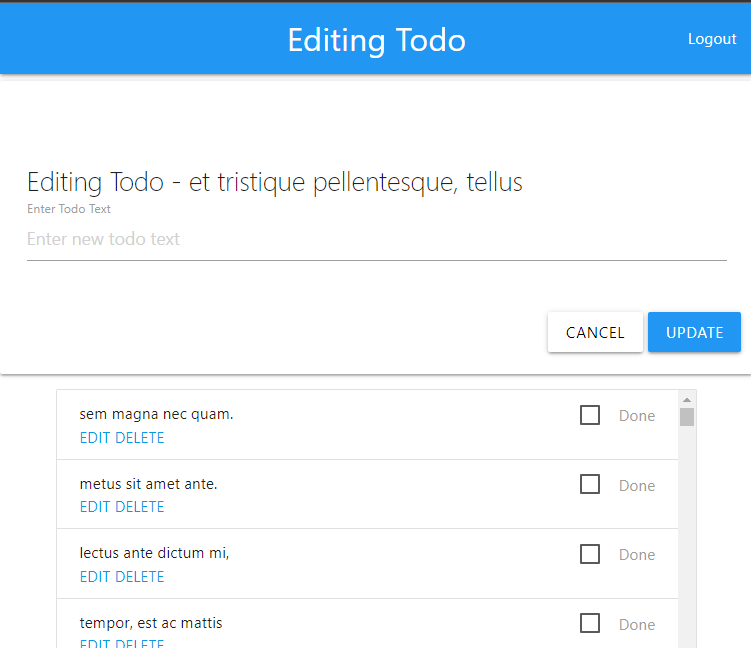
Now clicking the update button should take you to the edit page with the form. On submission you should be redirected to the todos page showing the updated todo. Notice how the edit page also has redundant view logic as the app page. This can give a more seamless experience for the user giving options to still view and operate on other todos.
We can add a link to each todo which will send a get request to delete the todo.
Task 6.1
Update routers/todo.py to include a functional deletion route
@todo_router.get('/deleteTodo/{id}')
def delete_todo_action(request: Request, id: int, db:SessionDep, user:AuthDep):
    todo = db.exec(select(Todo).where(Todo.id == id, Todo.user_id == user.id)).one_or_none()
    todos = []
    if not todo:
        flash(request, 'Invalid id or unauthorized')
    else:
        db.delete(todo)
        db.commit()
        flash(request, 'Deleted successfully')

    return RedirectResponse(url=request.url_for('app_dashbaord'), status_code=status.HTTP_303_SEE_OTHER)
Now users should be able to delete their todos when the corresponding delete button is clicked.
todo.html has a custom block called link that provides a logout link on the todos home page.
Implement a GET route to log the user out